The features discussed in this section are available throughout the Web portal. After login, you can navigate through the Web portal using the left navigation bar or the text hyperlinks found at the top and bottom of the Web pages.
An example of the left navigation pane for a provider is provided below:
|
|
Please note that the 'Bill Entry' hyperlink is only available to Field Nurses (provider type 41) and Vocational Rehabilitation Counselors (provider types 55-56) enrolled in the FECA program. |
Top navigation bar:

Bottom navigation bar:

A variety of objects are used to support the display and entry of information on the Web portal pages. An object is a single controllable entity that has definable characteristics. These objects have similar functionality wherever they appear. Objects include drop down list boxes, radio buttons, check boxes, etc.
|
Name |
Definition and Usage |
Example |
|
Hyperlink |
A link, or hypertext, is a selectable connection from one word, picture, or information object to another. |
|
|
Drop Down List Box |
A drop-down list box is a field with a down arrow at the far right edge. Clicking the arrow presents a list of items. To make a selection, click the down arrow. From the list, single-click on the item you wish to select. When a value is selected, the drop-down list box automatically closes. You can also close a drop-down list box without selecting an item by clicking outside the drop-down list box. |
Some drop-down list boxes have scroll bars to access additional information. |
|
Text Box |
A text box is a rectangular box in which you enter information. Text boxes allow entry of data in any format - alpha, numeric, special characters, etc. A text box is also referred to as a free-form text field. |
|
|
Radio Button |
Radio buttons are used to select one option. A radio button is a small circle that contains a dot when the option is selected, and is blank when the option is not selected. To change from not selected to selected, or from selected to not selected, simply click inside the small circle.
|
Refer to the Tabbing section of this chapter for browser specific behavior. |
|
Check Box |
A check box is a square box that is selected or cleared to turn on or off an option. When the checkbox contains a checkmark, it indicates a “true” or “yes” condition for the associated label name. When the checkbox is blank, it indicates a “false”, “no”, or “off” condition for the associated label name. Multiple check boxes can be selected.
|
Refer to the Tabbing section of this chapter for browser specific behavior. |
|
Command Buttons |
Command Buttons are rectangular buttons that are clicked to initiate the action indicated on the label of the button. |
The following buttons are frequently used throughout the Web portal.
|
|
Tabs |
Tabs are labeled groups of options used for similar functions. Click a tab to display the page. |
|
|
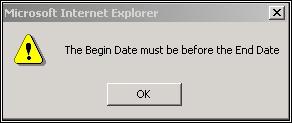
Response Window |
When a Response Window displays, it is the active window and no other window in the Web portal is accessible until you respond to it.
A response window is also referred to as a Pop-up. |
For example, if you enter an incorrect date, the response window shown above displays. Pop-up windows serve a messaging or warning purpose, with information about a particular function. Generally, to close a response window, click the Yes or OK, No or Cancel button.
|
|
Adobe® |
To facilitate ease-of-use, document files are in convenient Adobe® Portable Document Format® (PDF) format. Download this free software by clicking any of the Adobe image icons on the Web portal. |
A confirmation message prompts you to leave the Web portal and download the software to your PC. |
To be compatible with the Web portal’s security features, we require that you use one of the browsers listed below.
Microsoft Internet Explorer 6.0 with 128-bit encryption
Netscape Navigator 7.0 with 128-bit encryption
|
|
Please note that both Microsoft and Netscape currently only support their most current versions of browsers, which are IE 6 and NS 7.01. To determine which browser version you are using, click ‘Help,’ then ‘About’ on your browser’s file menu. |
To upgrade your Microsoft Internet Explorer browser go to the following address:
http://www.microsoft.com/windows/ie/default.htm.
To upgrade your Netscape Navigator browser go to the following address:
http://channels.netscape.com/ns/browsers/download.jsp
The Web portal encrypts confidential information. Encryption is a means of scrambling data for transmission or storage such that the data is unintelligible without unscrambling it with a specific key. To determine your browser’s encryption strength, follow the instructions below.
1. From the menu bar choose ‘Help.’
2. Then choose ‘About Internet Explorer.’
3. Look for the ‘Cipher Strength’ information, as shown below:
If your Cypher Strength is 128-bit, you are able to access this site's secure pages. However, if your Cypher Strength is less than 128-bit, download and install Microsoft's Internet Explorer encryption strength upgrade from the following address: http://www.microsoft.com/windows/ie/download/128bit/default.asp.
1. From the menu bar choose ‘Help.’
2. Then choose ‘About Netscape.’
3. Look for the ‘security’ information, as shown below.
With security strength of 128-bit, you should be able to access secure pages.
In addition to making sure browser version and encryption strength are correct, you must ensure that JavaScript is enabled on your browser. If scripting is disabled on your browser, an alert message appears on the web page, as seen below.

If your browser is not set up to allow scripting and you would like to enable this capability, you may click on the link to access directions to turn scripting on in your browser.
You can move from field to field on a page either by single-clicking with your mouse inside a field to position your cursor there or by pressing the Tab key. Pressing the Tab key moves you in a pre-determined sequence, called the tabbing sequence or order. This sequence is normally left to right, top to bottom, but may vary depending on the business needs of the window and the browser. Pressing the Shift key and the Tab key simultaneously initiates backward tabbing in the tabbing sequence.
Tabbing to checkboxes, radio buttons, and the actual tab at the top of a tab page window causes the cursor to disappear or to lose focus. The cursor is actually there in the field and you can enter data, although the field does not have focus. This action can be misleading at times, so be careful when tabbing through checkboxes, radio buttons, and the tabs at the top of the tab page windows.
When you tab to a checkbox on Internet Explorer, a small dotted rectangle appears around the box itself. This is an indication of focus. Pressing the Space Bar toggles the setting, from unchecked to checked or from checked to unchecked.
On some versions of Netscape, there might be a dotted rectangle as a visual indication of focus, but it appears around the associated text, which might be empty, in which case there would be just a fairly small empty rectangle on the right of the checkbox. The selection of a checkbox can be toggled using the Space Bar or Enter key.
On Internet Explorer, when a radio button group is reached via tabbing, the initially selected button is focused on, indicated by the dotted rectangle. You can use Arrow keys to move between the buttons inside the group; both "down" and "right" arrow move forward inside the group, and both "up" and "left" arrow move backward. Upon moving to a button, that button gets checked (and the button in the group that was checked gets unchecked).
On Netscape, when a set of radio buttons is reached via tabbing, the first button receives focus. Move forward inside the group by tabbing. Moving to a button that way does not change the setting. Use the Space Bar or Enter key to check a button.
The Web portal edits all data that is entered into the system. Data that fails system edits causes an error message to be generated. Error messages appear in a response window with an icon indicating the severity of the error, and an OK button to click to return to the window to correct the error.
Edits are processed in the following fashion:
As data is initially entered, invalid formats for dates, dollar amounts, and other fields generate an error message immediately upon leaving the field.
When saving, exiting, or moving to another page, the following groups of edits are applied in the sequence listed:
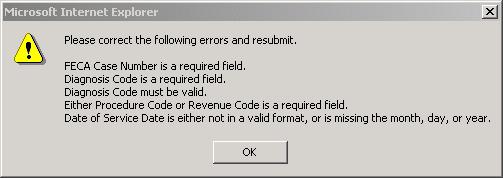
Required fields – a consolidated error message is presented to identify all required fields missing data. Following error corrections are data validation edits. See example below:
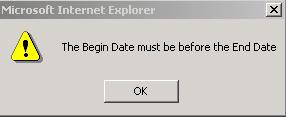
Data validation edits are performed within each separate data window. An example of these edits is validating that the ‘End Date is not prior to the ‘Begin Date.’ A separate consolidated error message list is presented for each data window. All errors for one data window must be corrected before the system proceeds to the next data window.
When saving or exiting (not changing tabs) a third set of edits is performed. These are cross-field validation edits. These edits compare data entered on one window against data entered on a separate window. The resulting error messages may or may not be consolidated.
All dates are entered in the numeric form MM/DD/CCYY, explained below.
MM is the two-digit month (January is 01, February is 02, and so on). Leading zeros do have to be entered as part of the format.
DD is the day within the month (Enter the first through the ninth days of the month as 01, 02, etc.) Leading zeros do have to be entered as part of the format.
CCYY indicates the year (1998 is in CCYY format).
Social Security Number must be entered as nine numeric digits. It must be entered with no separators such as dashes. Once the SSN is entered and saved, the system automatically displays the field contents in an edited format, i.e., with dashes.
For example, a Provider’s Social Security Number must be entered as “123456789”, but it will be displayed back as “123-45-6789”.
Telephone numbers must be entered as ten numeric digits. They must be entered with no separators such as dashes or parenthesis. Once the telephone number is entered and saved, the Web portal automatically displays the field contents in an edited format, i.e., with dashes. For example, a Provider’s telephone number must be entered as “1234567890”, but it will be displayed back as “(123) 456-7890.”
When entering a dollar amount, do not enter a dollar sign or a comma. Use dollars decimal cents format when cents are involved. For example, to indicate seventy-five dollars and eighty-three cents, enter 75.83 into the field. If you were to enter simply 7583, the system would interpret this as $7,583.00.
For whole dollar amounts, the entry of the decimal and two zeros to the right of the decimal are optional. For example, seventy-five dollars can be entered as 75 or 75.00.


 The Cancel button
allows you to abort an action without saving any data.
The Cancel button
allows you to abort an action without saving any data. The Continue
button allows you to advance to the next page or step in a process.
The Continue
button allows you to advance to the next page or step in a process.
 The Submit button
allows you to post entered data.
The Submit button
allows you to post entered data. The Update button
allows you to complete the edit of previously saved data on the page.
The Update button
allows you to complete the edit of previously saved data on the page.